I have been using Debian virtual machines for embedded Linux cross-development for the past few years in my consulting projects. My clients often need to work in a VM because they are issued a single Windows machine or they are just new to Linux and not ready to switch. The main reason I choose Debian is that the target systems are running Debian. Using the same OS on both systems makes it a lot easier, especially for my clients that have less experienced with Linux.
I originally developed these instructions for my clients but I thought they also might be helpful to others so I'm posting them here. Please leave a comment if you find any errors. I plan on more posts that will show how to set up the VM for BeagleBone Black development. These instructions use a 64-bit host OS and Debian OS so we can use the Linaro x86_64 (64-bit) Linux host toolchains.
You can also follow these instructions for setting up Debian Jessie development host on a dedicated hard drive if you skip the VirtualBox specific steps. This post covers a minimal installation of Jessie with XFCE. You can add more packages or choose another window manager if you have additional space.
1 Creating a Virtual Machine for Linux SBC Development
1.1 Prerequisites
The software installation requires a network connection on the host machine (the Virtual Machine connection is automatically configured by VirtualBox). The host machine should have a 64-bit processor. You will also need about 16GB hard drive space.
1.2 Install VirtualBox
VirtualBox 4.3.26 is current at time of writing. Download installer for your host machine.
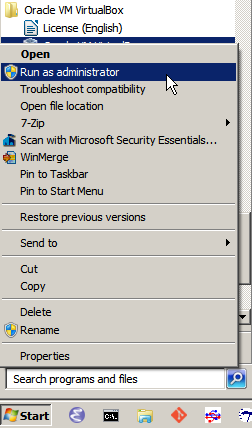
When you run the installer, right click and select Run as administrator.
1.3 Download a Debian installation image.
Debian 8.0 (Jessie) is the latest version at the time of writing.
http://www.debian.org/
Download the network install (netinstall) minimal CD image for a 64-bit PC. This version is called amd64, but it is for both AMD and Intel 64-bit Computers..
Here is the direct link to 8.0
1.4 Create new machine
To prepare for this next step you should identify the location of your virtual machine. You will need about 16GBytes of disk space. A virtual machine can be placed anywhere but if you have more than one physical drive, for best performance do not place it on your system drive (C:).
Open VirtualBox, start it using ‘Run as Administrator’ by selecting it in the Start Menu and right clicking to find the option.
In the Machine menu click New. Choose a name then click Next.

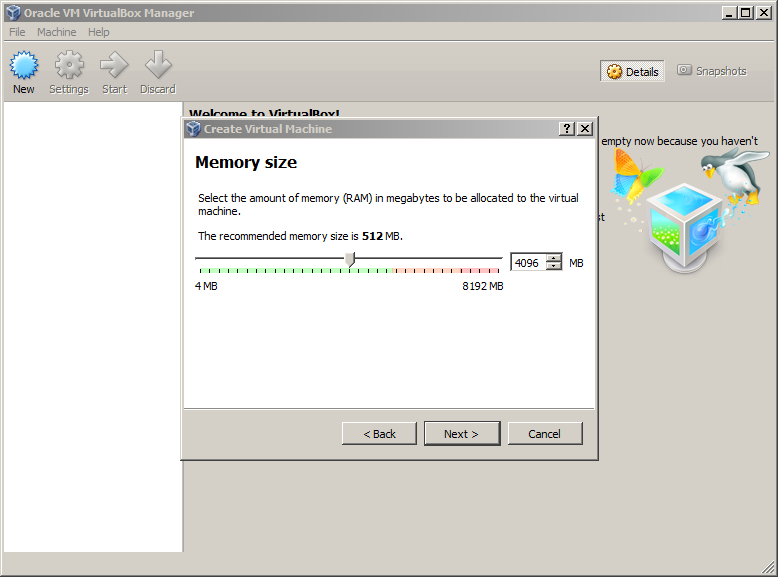
Select at least the default Memory size, stay in the green area in the slider, click Next.
Select Create a virtual hard drive now, click Create.

Select the default hard drive file type, VDI (VirtualBox Disk Image), click Next.

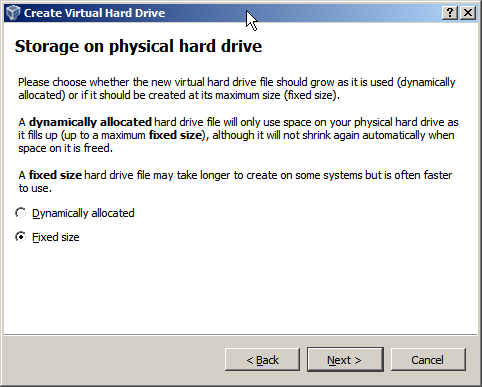
Select Fixed size hard drive, click Next.
Select the folder where you would like to store your Virtual Machine on your computer. If you select the default it may not show where it is being stored. Select at least 8.0GB for the virtual hard drive. If you will be building the Linux kernel a larger drive is recommended, 16GB to 40GB.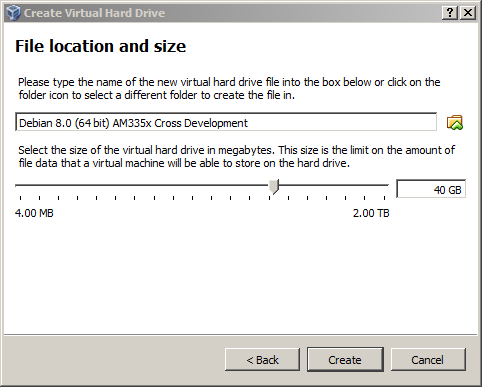
Select the size and click create. This takes a few minutes to complete.

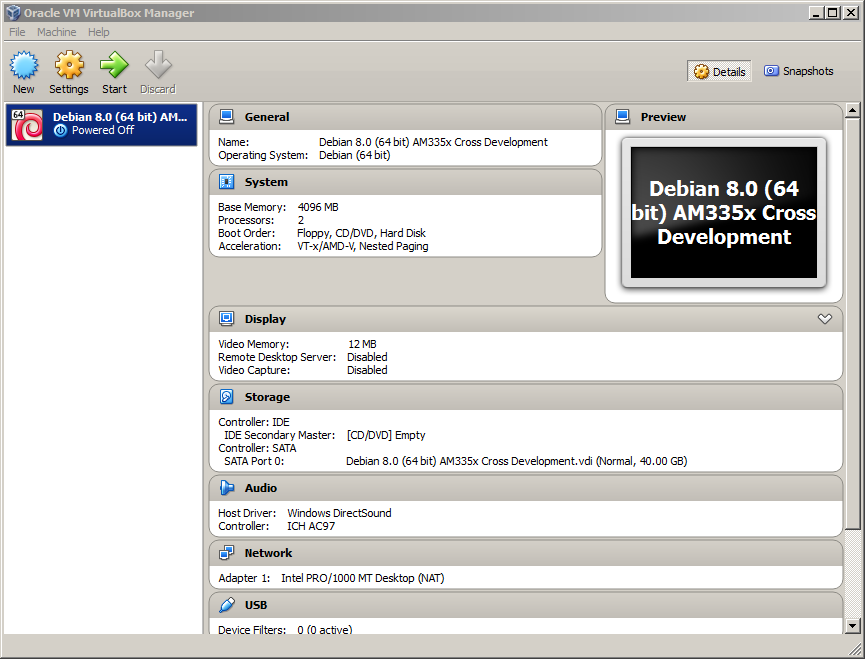
When it is finished your Virtual Machine is ready for the Linux Installation.
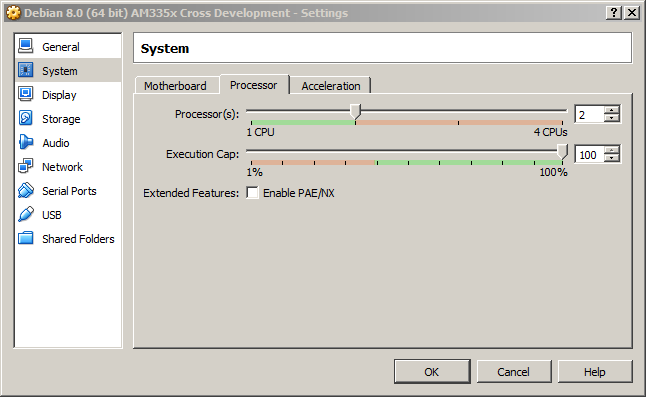
If you have enough processors you can change the VM settings to use more than one of them. In the Machine menu click Settings. Click on the System icon on the left of the settings window then click on the Processor tab. If you can stay in the green then add a processor to improve performance.
1.5 Install Debian
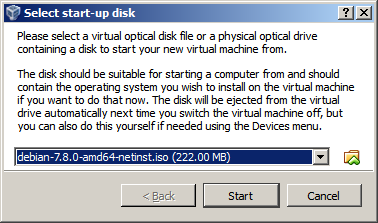
Highlight the Virtual Machine and click the green arrow to start it.
The Select start-up disk window will detect an optical (CD/DVD) drive by default for the installation medium. To use the .iso file that you downloaded instead, click the folder icon and browse to the place you stored the Debian netinstall iso file.
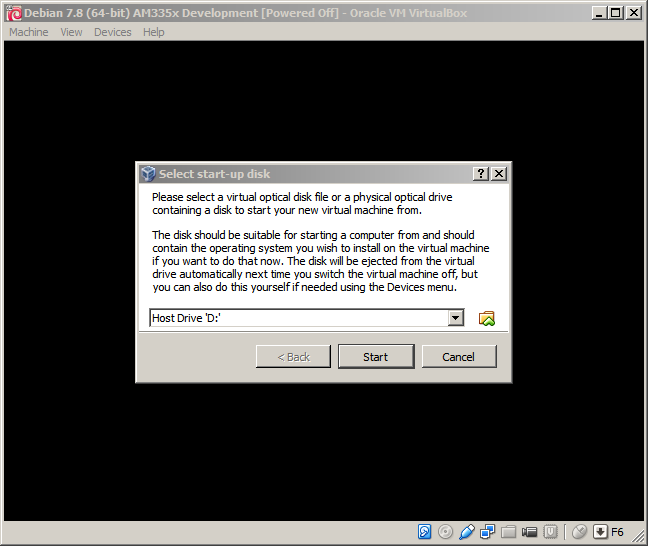 After you find the Debian .iso you downloaded, click Start.
 After the Debian boot menu appears, select the window with your mouse and press enter to start the Install.
Select the defaults for the next three screens, you can use the tab or arrow keys to navigate the screens. The next three defaults are English, United States, American English.
This starts some installation work then the network configuration screen asks for a hostname. You can use the default (debian) or make something up.
Next is the domain name, you don’t need to enter anything on this screen.
The next screen asks for a root password.
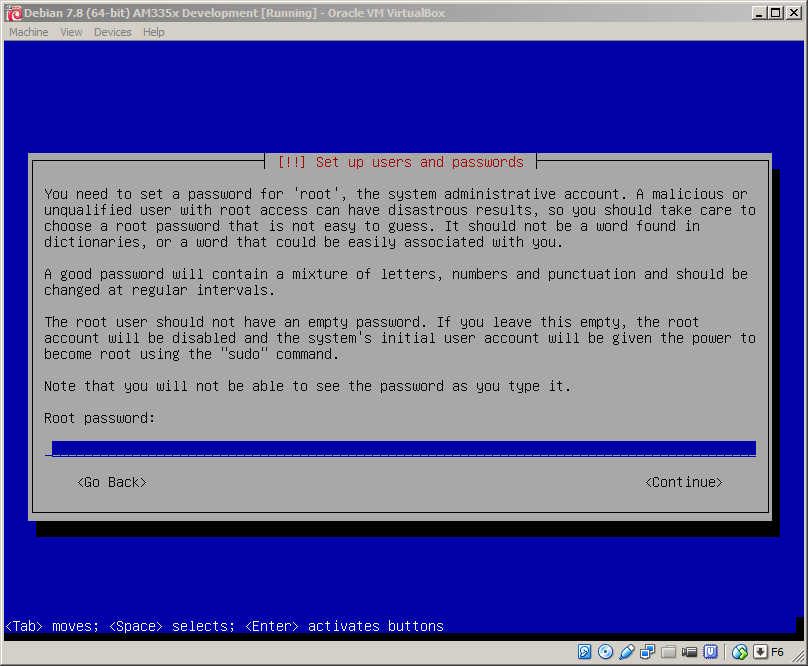
Remember to write this password down.
Create a user login to use for development work. For example, your first name or initials (usually all in lower case). You can just enter the same name on the next two screens.
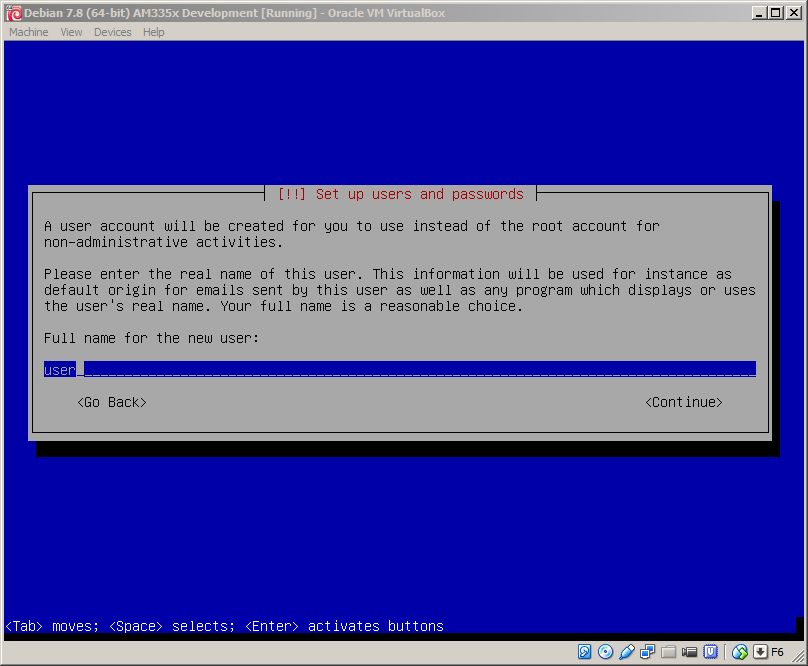
It will prompt for a password for the user that you created, make sure to write it down.
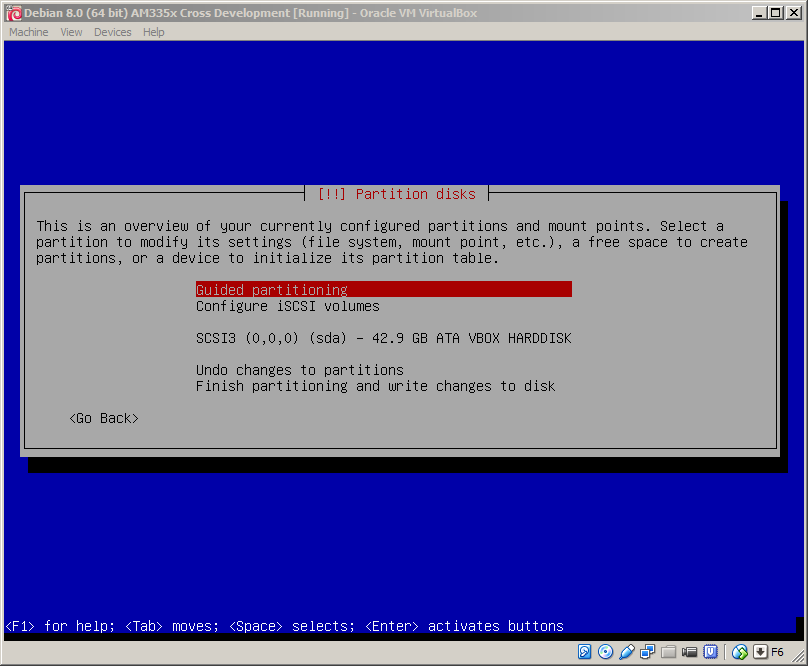
The partition disks screen will have Guided partitioning selected, click enter to continue.
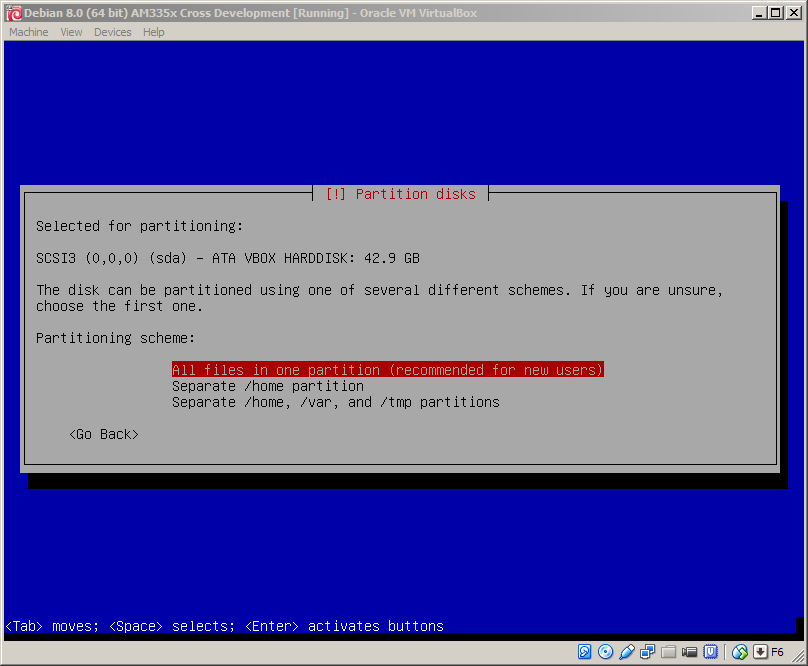
Choose Guided - use entire disk. This will only apply to the virtual disk you created for the VM.
 Press enter.
 Choose the default and enter,
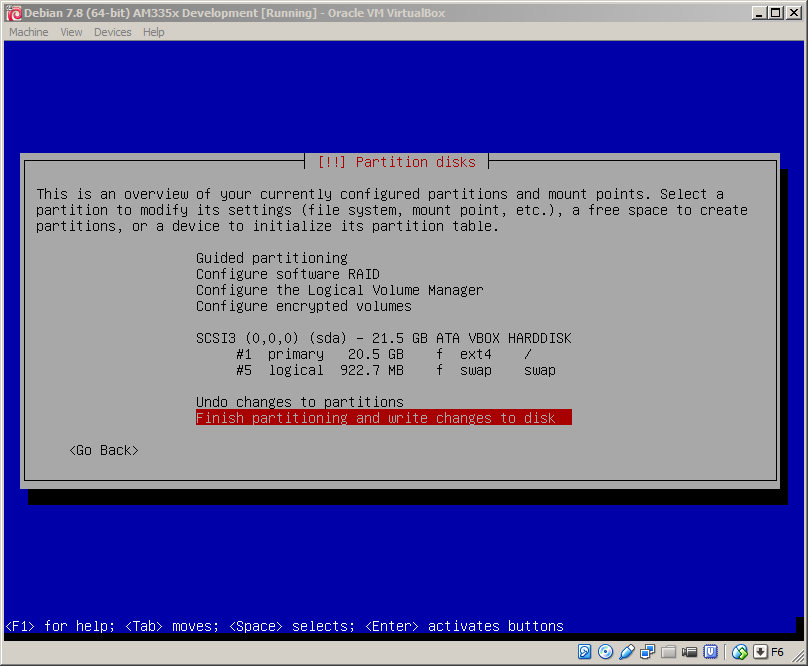 If everything looks good press enter. You will get a confirmation screen and need to select 'Yes' and enter to start the base installation.
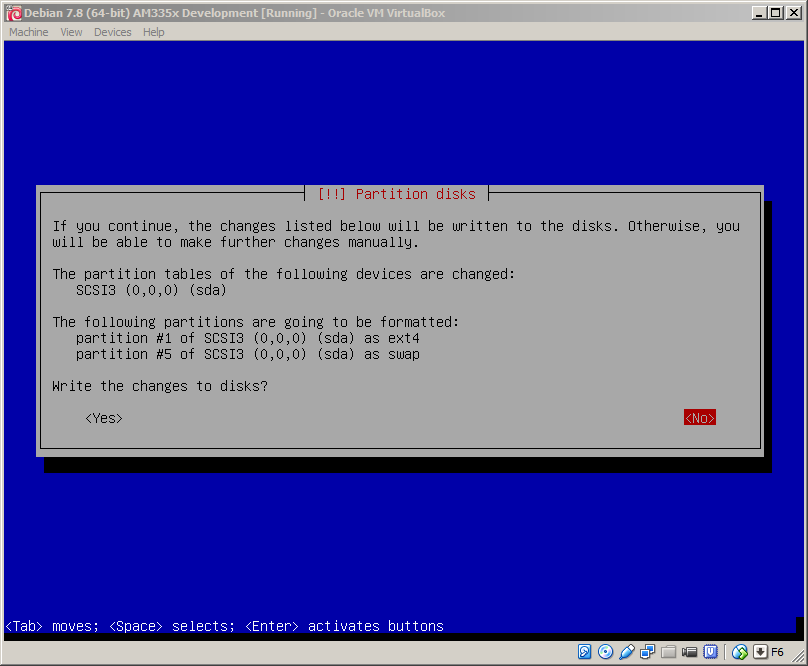 Partitioning will take a few minutes.
When this is finished, you will be asked to select a local server (mirror) to download files, choose a mirror close to you by selecting a country, then a server address for an organization near you.
Skip the proxy on the next screen, this starts file retrieval which takes a few minutes.
When that is finished, select the default for the package usage survey (popularity contest).
The software selection is next, unselect all choices except Xfce. The apt-get utility will be used to install any software that is needed later.
 Select continue, software retrieval will take a minute or two.
The next prompt will ask to install the GRUB boot loader, click yes. It will not affect the windows boot, just the virtual machine virtual disk.

Choose /dev/sda for the boot loader installation device and press enter.
 The installation will complete in about another minute.
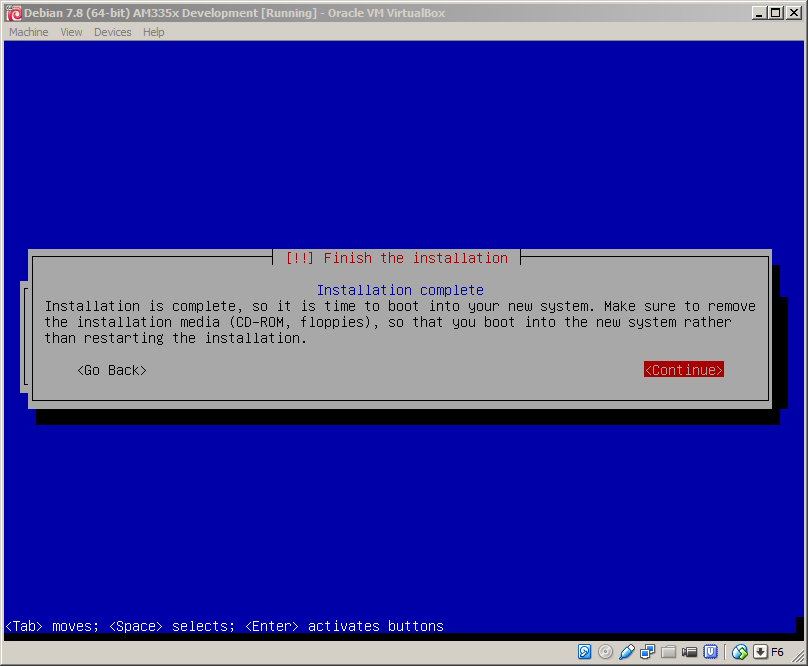 After you press enter, the virtual machine will reboot and launch Debian. It will pause for a few seconds during boot asking which OS to select; don’t press any key.
The system will boot up and display the login prompt. Login as root this first time to install packages and configure the system.

In the above window in the lower right corner there is a down arrow by it shows the current host key combination. This key cannot be used by Linux because VirtualBox by default uses it for key combinations to do various things like adjust window size. The default is the right control key. That key is used by some linux editors but you can change the host key combination to something you don’t use. I already changed it to F6 but you can choose any key that you don’t use in Linux.
To change the VirtualBox host key go to the Oracle VM VirtualBox Manager window. Open the File menu and click Preferences.
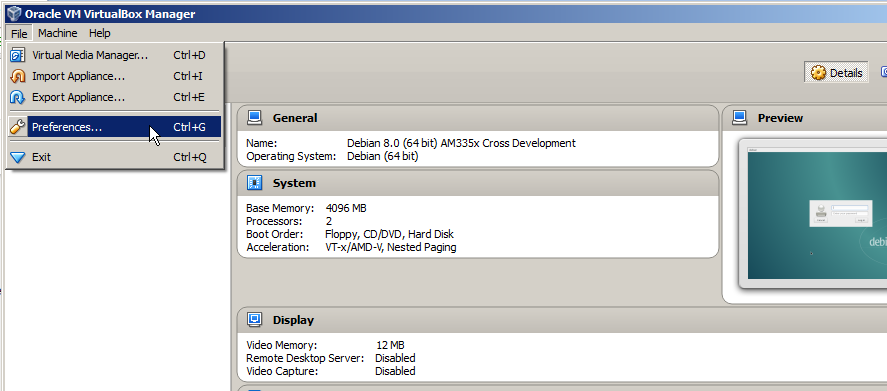
Click on Input and then the Virtual Machine tab.
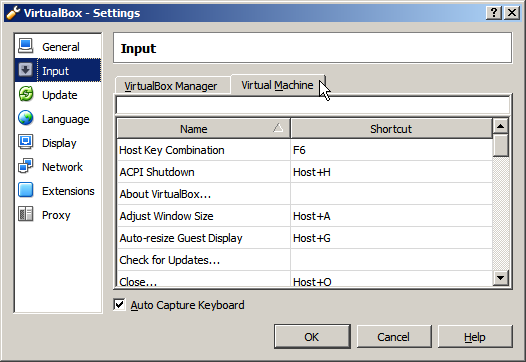 Click on the Right Ctrl shortcut and then press the key you want to use instead on the keyboard. It will automatically show up in the box.
 Click OK, the virtual machine window should now show the new key in the lower right corner.
1.6 Install VirtualBox Guest Additions
The Guest Additions allow you to share folders between the host machine and the Virtual machine.
Login as root and open a terminal to install some development software to build the guest additions. You can open a terminal by right clicking the mouse on the Linux desktop and clicking Open Terminal Here.

1.6.1 Edit sources.list
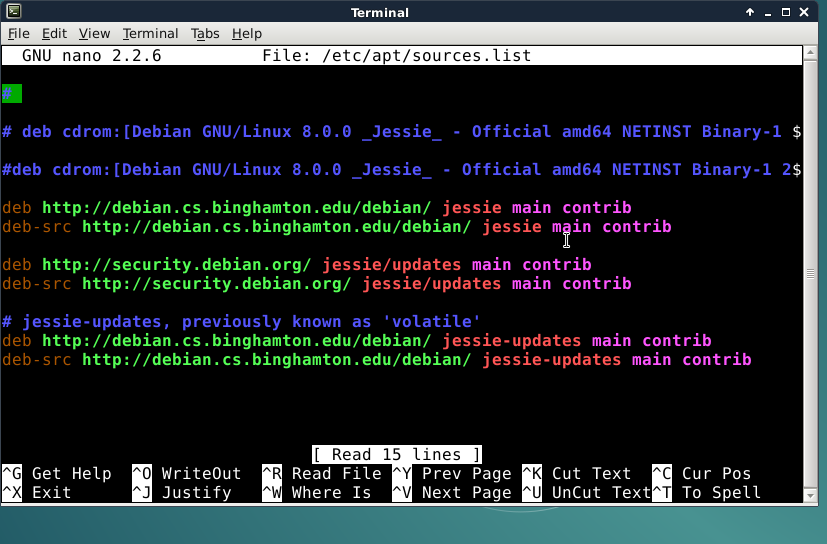
Edit /etc/apt/sources.list with the vi or nano editor.
root@debian:~# nano /etc/apt/sources.list
Add ‘contrib’ to the end of each line that is not commented.
 If you use nano press CONTROL-O, ENTER to write (WriteOut) the file then CONTROL-X exit.
Here is an example file that doesn’t use mirror servers. If you make a mistake editing you can just make the file look exactly like this.
deb http://ftp.us.debian.org/debian jessie main contrib
deb-src http://ftp.us.debian.org/debian jessie main contrib
deb http://security.debian.org/ jessie/updates main contrib
deb-src http://security.debian.org/ jessie/updates main contrib
deb http://ftp.debian.org/debian/ jessie-updates main contrib
deb-src http://ftp.debian.org/debian/ jessie-updates main contrib
Update the system to use the new sources.list file
root@debian# apt-get update
1.6.3 Build and Install Guest Additions
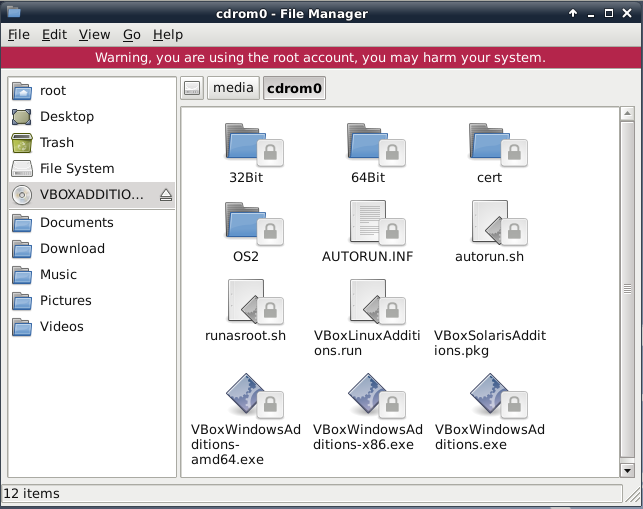
Go to the VirtualBox menu in the window containing the virtual machine, select Devices->Insert Guest Additions CD Image.

In a few seconds you will see an icon for the CD on the desktop.

Double click on the VBOXADDIT... CD icon. This will mount the drive and you should see the file manager open.
To make it easier to enter longer commands, you can cut and paste the commands into the virtual machine if you enable shared clipboard in the Virtual Machine window.
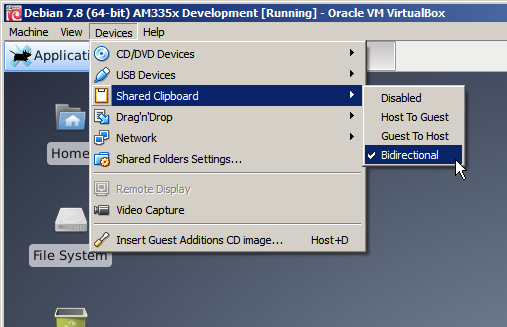 To use the shared clipboard, you must be in the graphical mode and use a terminal emulator window. To use the shared clipboard, highlight text in windows, press CONTROL-C and then move the mouse to a terminal window in the VM Debian Linux Window and press the middle mouse button (or scroll wheel). In some programs you can use the Edit->Paste menu item.

root@debian:~# apt-get install build-essential module-assistant
root@debian:~# m-a prepare
root@debian:~# sh /media/cdrom/VBoxLinuxAdditions.run
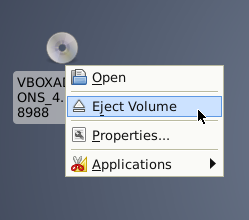
After that completes eject the volume.
root@debian:~# reboot
When the machine comes up go to the VirtualBox menu select Devices->Shared Folder Settings...

Select the blue folder with a green plus to the right to add a new shared folder.
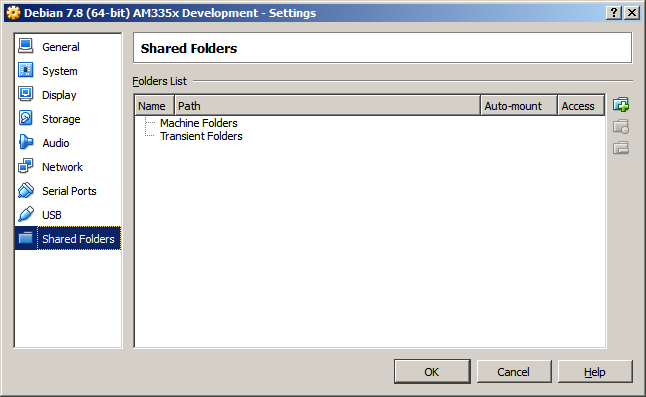
Select auto-mount and Make Permanent and press OK.

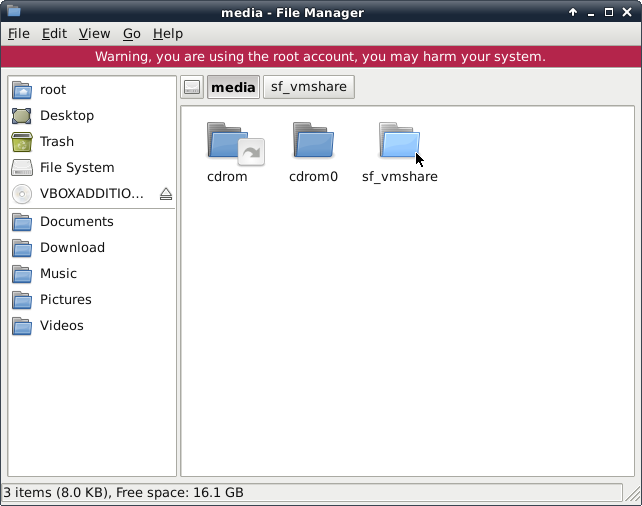
Reboot the virtual machine and login into the user account you created to see the shared folder. It will be located in the Linux virtual machine in the /media path with the prefix sf_ so for example /media/sf_vmshare will allow you to access the windows C:\vmshare directory.
1.7 VirtualBox USB-to-serial Device Setup
During development you will want a serial connection to the target board to interact with the Linux console. This section is optional because I have found the serial communication in VirtualBox sometimes hangs (I haven’t seen any issue with serial communication with Linux unless outside a VM). You should use a host OS program like teraterm in windows for reliable communication. You still might want to set up serial for occasional use.
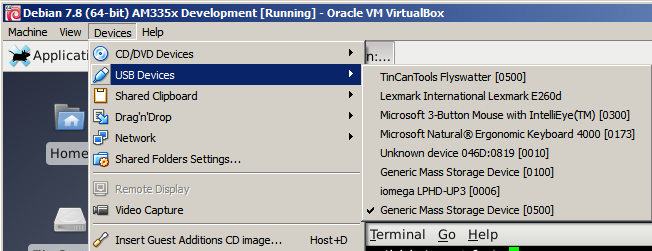
If you connect a USB-to-serial device to the windows host, you need to let the VM take control so Linux can access it. You do this from the Devices Menu. Select USB Devices and look for the FTDI part number in the list.
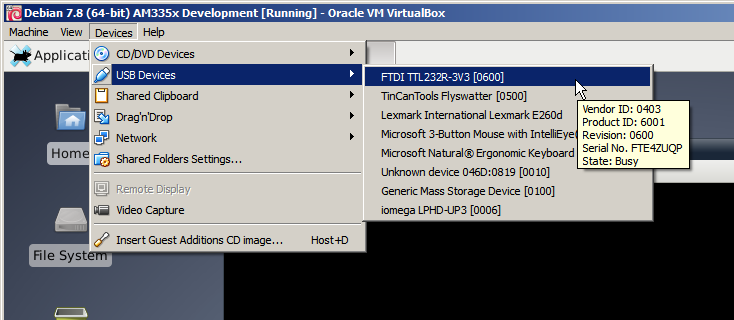
Click on the device and Windows should install VirtualBox USB and then the device will show up on the list with a check mark.
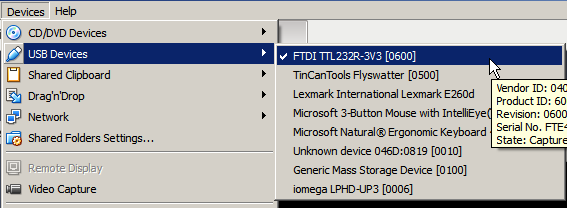
Now the device is available in Linux.
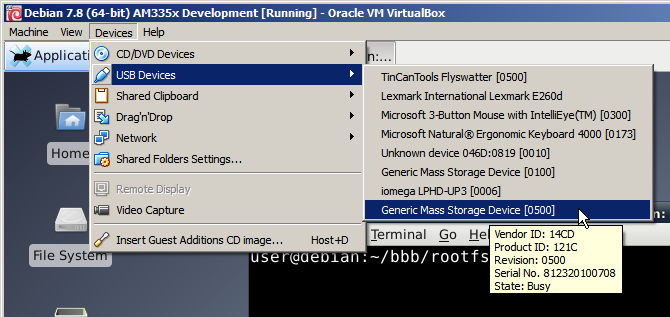
1.8 VirtualBox SD Reader Connection
We need low level access to an SD card to create a microSD that will be bootable in the BeagleBone Black. The easiest way to access a SD or MicroSD card in a virtual machine is to use a USB card reader. If you don’t have one and need to use the built in SD slot here is a link that shows how to get raw access to a physical drive in VirtualBox.
https://scottlinux.com/2010/06/26/raw-disk-access-with-virtualbox/
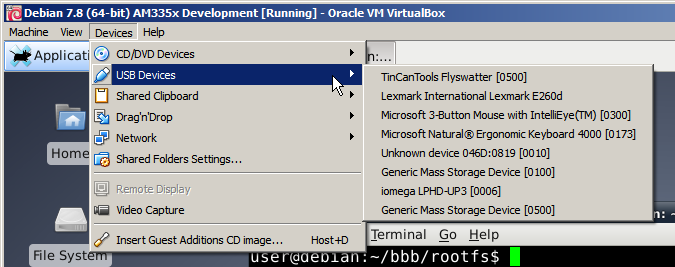
Connect a USB SD card reader to the computer. We need to find it in the list of USB devices in Virtualbox.
https://scottlinux.com/2010/06/26/raw-disk-access-with-virtualbox/


No comments:
Post a Comment