Part 2: Changing Words
In this part, we will use the words ""On" and "Off" to control the LED and turn it on and off.
To do this, we can use the Google Commands dataset which has data for many short words. The following video by Digi-Key includes instructions for Downloading the dataset. Although it is not labeled as machine learning in the title, it is similar to what is being done in this ML guide.
2.1 Downloading Python Script
The Dataset Curation Python Script is available to download. Here are the steps to extract it properly, as the video instructions are shown too quickly.
2.1.1 Install 7-Zip
For extracting the file
On the 7-Zip Download Page Select the download for your machine. (I'm using Windows 7 64-Bit)

Once downloaded, open the .exe file. (You may need to click "Allow Changes" in the pop-up window) Next, Install.

2.1.2
Click on the green "Code" box and select the "Download ZIP" option that appears

2.1.3
Left Click on the Downloaded zip file, then click on "Show more options".
2.1.4
Under "Show more options" Hover over "7-zip", then click on "Extract Here"
2.1.5
Once it's extracted, open File Explorer and search for "ei-keyword". Open the "ei-keyword-spotting-master" folder.

2.1.6
Copy and paste the "dataset-curation" and "utils" Python files into a directory where they can be accessed.

2.2 Downloading Speech Commands
As shown in the video description, here is a download link for the Google Speech Commands Dataset. If a page appears when following this link, click on "Go to Site" to start the download.

2.2.1
Left Click on the Downloaded zip file of the Dataset, then click on "Extract All"
2.2.2
Create a folder for housing the necessary files. In this example I named it "Speech_Rec".

2.2.3
Cut and paste the _background_noise_ into the created folder. The background_noise_ must be stored seperately from the individual keywords.


2.2.4
Create a folder for housing keywords such as "on" and "off". (The video example includes using custom keywords as well)

2.2.5
Copy and paste the "on and "off" keywords into the newly created "keywords" folder

2.3 Using the Program
2.3.1
Python will need to be installed to run the speech Recognition Code Download Python
Click on the yellow box to download the latest version.


2.3.2
If you already have Python installed, it may ask to upgrade to the latest version. Otherwise, there should be an option to install.

2.3.3
An option to close the installer will appear once setup is successful

2.3.4
Open Windows Powershell (Terminal)( and type the following command:
pip install librosa numpy soundfile
This installs all the necessary Python libraries for the speech recognition.

2.3.5
While in the PowerShell, go to the folder that contains all the speech recognition files ("Speech_Rec").To find the path click on the folder name in file explorer, then left click and select "Copy Address"

Use the cd command followed by the path to the directory, for example: cd C:\Users\maxcl\Downloads\Speech_Rec

2.3.6
Next, enter the following line into the terminal. It runs the dataset-curation.py script and sets all the necessary parameters.
python dataset-curation.py -t "on, off" -n 1500 -w 1.0 -g 0.1 -s 1.0 -r 16000 -e PCM_16 -b "..\Speech_Rec\_background_noise_" -o "Speech_Rec\keywords" "..\Speech_Rec\data_speech_commands_v0.02" "..\datasets\keywords"

The script may take a few minutes to run.

2.3.7
Once it's finished, a set of folders named after the input, output, and keywords can be found in the directory. (Note: In this case, the folder name "Speech_Rec" appeared twice so I changed the second one to "results")

2.3.8
Open the "on" folder and select one of the audio samples to play.

2.4 Edge Impulse
2.4.1
Next, we will go to Edge Impulse. Click on the "Login" Option in the top left corner of the home screen, as this will give you the option to either log into your account or create a new account.

2.4.2
Once you've created an account and/or logged in, click on the icon in the top left, then click on "Projects"

2.4.3
Click on "Create New Project"

2.4.4
Name your project then click on the green "Create New Project". I chose to leave this one as public.

2.4.5
In the new project, Click on "Data Acquisition"

2.4.6
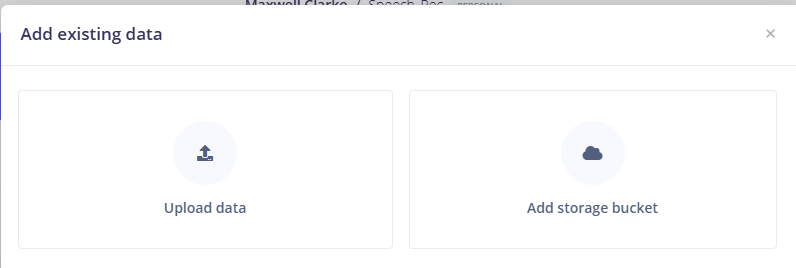
Next, click on "Add Data"

2.4.7
Select "Upload Data"
2.4.8
Leave the default selections for category and label, and click on "Select Files"
2.4.9

Start by uploading all the files in the noise folder. (I selected all by clicking on the box next to "name"). Click "Open"

2.4.10
Afterwards, click on the purple "Upload Data" button

Edge Impulse will then process and add the files to the project.
2.4.11
Repeat steps 2.4.8 through 2.4.10 for the "on" "off" and "unknown" categories.
2.4.12
The pie charts at the top of the Dashboard should show that the data is split amongst the four categories, and 80% of the data was assigned to training and 20% was assigned to testing.

2.4.13
On the left side, Click on Impulse Design, then Create Impulse. Click on " Add Processing Block".

2.4.14
Add the Audio (MFCC) Processing Block
2.4.15
Select the "Add a Learning Block Option", then choose the default "Classification" Block


2.4.16
Click on the Green "Save Impulse"

2.4.17
From the MFCC on the left, Select the Generate Features tab, then click on "Generate Features"

2.4.18
Next, under Classifier on the left, choose Save & Train.

2.4.19
Now that the model is trained, the loss and accuracy of the model will appear. The accuracy refers to the percentage of the data that was correctly classified. As for loss, it is based upon a predefined function, and a smaller loss value indicates better ML model accuracy.

2.4.20
To test the model, go to Model Testing on the left. Select "Classify All".

2.4.21
Once the testing is done, the results will be shown.

2.4.22
Next, we will deploy the model for Arduino. Click On the Search Bar and select the Arduino Options. (Note: There are other options that can be used for other Microcontrollers such as STM32 devices)

2.4.23
Select "Build" to create the Arduino Library, which will Download automatically.


2.5 Arduino
2.5.1
In the Arduino IDE, open a new Arduino Sketch (File - New Sketch)
2.5.2
Once you're in a new sketch, select Sketch-Include Library- Add .ZIP Library and open the library downloaded from Edge Impulse

2.5.3
Next, Go to File- Examples and scroll down to find the library you just installed. It should have the same name as the project in Edge Impulse. Go to "Speech_Rec_inferencing"(May differ based on your project name) - "nano_ble33_sense" - "nano_ble33_sense_microphone_continuous". Note: the Arduino IDE might need to be restarted for it to appear)

2.5.4
Open the File Explorer, and go to the newly installed Speech_Rec library and locate the Model variables file. The path will likely be: User > Arduino > libraries > Speech_Rec_Inferencing > src >model_parameters > model_variables

2.5.5
Open the model_variables.h file in a code editor such as VS Code, and search for where the keywords are listed.
The line will likely be:
const char* ei_classifier_inferencing_categories[] = { "_noise", "_unknown", "off", "on" };
In this case "_noise" is in position 0, "_unknown" is in 1, "off" is 2, and "on" is 3.

2.5.6
Return to the Arduino IDE. In the nano_ble33_sense_continuous example, create a new line under
line 59: static int print_results = -(EI_CLASSIFIER_SLICES_PER_MODEL_WINDOW);
The new line will read: static const int led_pin = LED_BUILTIN;

2.5.7
Next, go a few lines down to be within the void setup() { block of code.
Type the following line: pinMode(led_pin, OUTPUT);

2.5.8
Even further down in the code, above line 114: if (++print_results >= (EI_CLASSIFIER_SLICES_PER_MODEL_WINDOW)) {
Enter the following block of code:
//turn on LED if "On" vlaue is above a threshold
if (result.classification[3].value > 0.7) {
digitalWrite(led_pin, HIGH);
}
//turn off LED if "Off" vlaue is above a threshold
else if (result.classification[2].value > 0.7) {
digitalWrite(led_pin, LOW);
}
else {
digitalWrite(led_pin, LOW);
}
This code controls whether the LED is "on or "off" based on the keyword recognized. the result.classification[2] and result.classification[3] values are consistent with the labels for "Off" and "On" found in the model_variables.h file.

2.5.9
Next, click the arrow to upload the code. It may take awhile to compile, as it is a lengthy code segment

2.5.10
Once the code is complied, speak the keywords within a couple inches of the board. The voice needs to be very close for the recognition to work. If the board recognizes a word with a confidence value of 0.7, the LED next to the USB will turn yellow.

2.5.11
To check the readings for the speech recognition values on the board, you can look at the serial monitor in the Arduino IDE. To do this click on Tools > Serial Monitor (or type Ctrl + Shift + M). The serial Monitor continually shows the speech rec values for all the keywords, as we are in the continuous example.

We now have a working Arduino program that uses machine learning to recognize the words "on" and "off". In the future, the code can be adjusted so that the LED stays on for longer, thus making the "off" command more effective.

